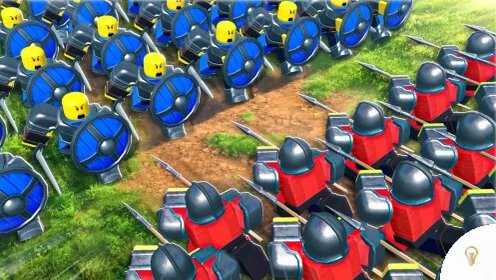
Shield units are the backbone of many Command an Army formations. They can protect the capture point, absorb pressure, and give archers time to deal damage. Shieldbreaker units create the opposite kind of pressure. They are used to challenge defensive lines and force shield heavy armies to change position.
This guide explains how shield units and shieldbreakers fit into a team battle. It also covers positioning, support, and the situations where a shieldbreaker is useful. If you are saving resources for summons, you can also check the latest Command an Army codes. Free Gems from active rewards can give you more chances to summon the units you need without spending all of your match earnings.
What Shield Units Do
Shield units are front line troops designed to stay in the fight. Their main job is not always to defeat an enemy quickly. Their value comes from holding space while other units attack from safer positions.
- Hold the objective: shields can stand near the capture point and make it harder for opponents to move through.
- Protect support: archers and other ranged units can work from behind a shield line.
- Buy time: a durable front line gives your team time to regroup or bring reinforcements.
- Control movement: a compact shield formation can limit the routes available to an attacker.
Shield units become much less effective when they are separated from the rest of the army. A shield wall without ranged support can be surrounded or ignored. A shield unit that advances too far can also leave the capture point and expose the rest of the team.
Shieldman and the Shield Evolution Path
Shieldman is a practical early front line choice because it is affordable and easy to understand. New players can use Shieldman to learn how to hold ground while developing ranged support behind it.
The documented shield path leads from Shieldman toward Sentinel and then Imperial Guard. That gives the shield role a long term progression route. Instead of replacing every early unit immediately, you can continue improving a unit family that already fits your formation.
Do not treat the evolution path as a reason to use shields in every situation. The value of an evolved shield unit still depends on positioning, support, and the enemy composition. A strong front line needs a plan for cavalry, ranged attacks, and shieldbreaker pressure.
What Are Shieldbreaker Units?
Shieldbreakers are units or attacks that put pressure on defensive formations. Their purpose is to make a shield line less comfortable by damaging it, splitting it, or opening a route for other units.
The current guide identifies Mace and Javeliner as shieldbreaker options from the NEW UNITS update. They do not replace every other class. Instead, they give an army more ways to challenge a formation that depends heavily on shields.
- Mace: a close range shieldbreaker that can pressure the front line when protected by other troops.
- Javeliner: a lower range shieldbreaker that needs careful positioning because it can be vulnerable to arrows and cavalry.
The exact value of these units depends on the battle. A shieldbreaker sent forward alone can be defeated before it reaches the defensive line. Use it as part of a coordinated push rather than as a replacement for the entire front line.
How to Use Shieldbreakers Against a Shield Wall
Start by identifying what is behind the enemy shields. If archers are protected by the front line, attacking the shields from one direction may not be enough. Your goal is to create pressure from a second angle or force the opponent to move.
- Keep your main force together. Use normal front line units to prevent the shieldbreaker from being isolated.
- Apply pressure to one section. Concentrated damage can create an opening faster than several weak attacks.
- Watch for cavalry. Shieldbreakers with limited range need protection from fast flanking units.
- Use ranged support. Archers can punish defenders who turn their formation to respond.
- Push after the opening appears. Do not wait so long that the enemy reforms the shield line.
This approach makes the shieldbreaker part of a larger formation plan. The unit creates the opening, but other troops must use that opening before it disappears.
How to Defend Against Shieldbreakers
When you are using shield units, do not allow the enemy to focus on one section of your formation without a response. Keep support units close enough to help, but do not place every troop in one crowded group.
- Keep archers behind the shield line and move them when cavalry approaches.
- Use spears or other anti cavalry options to protect the sides.
- Rotate the front line instead of letting one unit absorb every attack.
- Use a tighter formation when the enemy is trying to split your army.
- Move away from a bad engagement instead of defending an exposed position.
A shield army is strongest when it controls the location of the fight. If a shieldbreaker forces you into open ground, rebuild the formation near the objective or a position that your support units can cover.
Shield Units and Shieldbreakers in Different Roles
Holding a Capture Point
Shield units are usually more valuable when the objective must be held. They can make the approach difficult while ranged units contribute damage. Shieldbreakers are useful when the enemy has created a defensive block around the point.
Attacking an Open Position
Shieldbreakers can help an attacking team begin a push, but they still need protection. Cavalry can pressure the sides while archers support the main attack. The shieldbreaker should not be the first and only unit to reach the enemy.
Responding to Cavalry
Shieldbreakers are not automatically the best answer to cavalry. Spears and careful positioning are important because some shieldbreaker units are vulnerable to fast attacks. Build a formation that covers both the enemy front line and its flanking route.
Summoning Advice for Shield and Shieldbreaker Rosters
Before spending Gems, decide whether your army needs a stronger defensive core or a way to challenge shield heavy opponents. A shield focused roster needs ranged support and anti cavalry protection. A shieldbreaker focused roster needs a stable front line that can keep the specialist alive.
Check the active banner and displayed summon odds before using your resources. If you are short on Gems, redeeming available codes can help you reach another summon session. Keep the process practical. A unit that fits your current formation may be more useful than a rare unit that cannot be fielded effectively because of your Star Limit.
Common Shield and Shieldbreaker Mistakes
- Sending a shieldbreaker into the enemy line without support.
- Using shields without archers, spears, or a clear objective plan.
- Ignoring the enemy cavalry while focusing only on the front line.
- Standing still after a shieldbreaker creates an opening.
- Spending every Gem on a banner without checking its odds.
- Using the same formation after the opponent changes their unit mix.
Final Strategy
Shield units and shieldbreakers represent two sides of the same battle problem. Shields protect space and create time. Shieldbreakers challenge that space and create movement. Neither role works at its best without support.
Build your army around a clear purpose. Use shields to control the objective, protect ranged units, and force the enemy to approach. Use Mace or Javeliner style shieldbreakers when the opponent relies too heavily on a defensive line. Keep cavalry, spears, and archers in the plan so the specialist unit can reach the fight and survive long enough to matter.
FAQs
Shield units hold ground, protect support troops, and help a team control the capture point.
The current guide identifies Mace and Javeliner as shieldbreaker options from the NEW UNITS update.
Protect it with a main force, focus pressure on one section of the enemy line, and use ranged or cavalry support to exploit the opening.
Keep support units nearby, protect the sides from cavalry, rotate your front line, and move away from exposed positions when necessary.
Codes can provide free rewards such as Gems. Check the active code list before spending resources on summons.