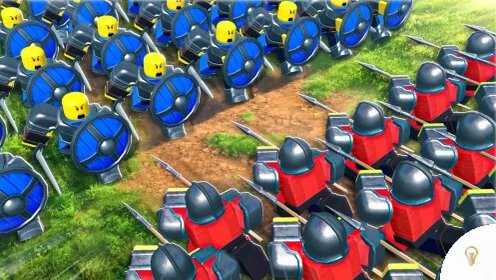
Formations in Command an Army are battle commands that change how your units move, spread out, and meet the enemy. A good formation is not automatically best for every unit. Shields need a shape that protects the capture point, archers need space and cover, cavalry needs room to flank, and spears need a position where they can meet enemy horses.
Before spending Gems to build a new roster, you can check the latest Command an Army codes. Extra rewards can help you summon units and test different formations without using every Gem earned from matches.
The Four Formations
The current Command an Army formations guide identifies four commands that can be used during battle.
- Line: spreads units across the front and works well for a standard advance.
- Triangle: points the army forward and suits an aggressive push or rush.
- Wall: locks units together and is useful for defending a capture point.
- Circle: creates a defensive pocket that can stop cavalry charges.
Switching formation at the right moment is often more important than choosing one formation at the start. Watch the enemy’s movement, then change the shape before your units become isolated.
Best Formation for Shield Units
Shield units are strongest when they control space. Use a wall formation when you need to hold a capture point or protect ranged support. A compact front line makes it harder for attackers to walk straight through your army.
The wall should not stand alone. Keep archers behind it and place spears where they can respond to cavalry. If the shield line moves too far forward, the backline may lose protection. If it stays too far away, the enemy can capture the objective before the formation arrives.
For a flexible defense, begin with a wall and switch to line formation when the enemy retreats. This lets your army advance without keeping every unit packed into one position.
Best Formation for Spear Units
Spear units are useful against cavalry, so their position should cover the route that enemy horses are most likely to use. Keep spears behind or beside the shield line instead of placing them alone at the front.
A wall formation can create a strong anti cavalry barrier near the objective. A line formation is better when spears need to cover a wider approach. Avoid sending spears forward without support because ranged units can punish an isolated defensive group.
When cavalry is preparing a charge, do not chase too far. Let the enemy enter the area covered by your front line, then use the spear formation to punish the contact.
Best Formation for Archer Units
Archers need distance, visibility, and protection. They usually work best behind shields or other durable units rather than at the front of a triangle push.
Use a line formation when archers need to spread their damage across several targets. Keep enough space between the backline and the enemy so cavalry cannot reach every archer at once. If horses begin moving around the side, switch the front line into a tighter defensive shape or move the archers behind a wall.
A triangle formation can help an archer army advance, but only when shields are leading the point. A triangle made entirely of archers is easy to punish because the formation has damage but little protection.
Best Formation for Cavalry Units
Cavalry depends on movement. A line formation can help cavalry spread across a flank, while a triangle can support a focused attack against an exposed target. Cavalry should usually avoid charging directly into a wall of shields or braced spears.
Use cavalry to reach the enemy backline, pressure archers, or chase units that have separated from their team. Keep a route open for retreat because a failed charge can leave cavalry trapped near the objective.
Do not charge a circle formation with horses. The circle is specifically useful against cavalry because it gives the defending units a protected shape. Go around the formation, wait for it to open, or attack another part of the battlefield.
Formation Counters to Remember
- Cavalry swarm: answer with braced spears, a wall, or an anti cavalry unit.
- Shield wall: use shieldbreakers such as Mace or Javeliner with support.
- Archer stack: send cavalry around the front line and target the backline.
- Shock infantry: use archers behind a shield screen and avoid an isolated melee fight.
- Circle formation: do not rush it with cavalry. Reposition or attack from another angle.
How to Change Formation During a Match
- Identify the enemy’s main damage source.
- Check whether the objective or the backline is under threat.
- Use wall or circle when you need to survive a charge.
- Use line when you need wider coverage.
- Use triangle when your team is ready to push together.
- Change again after the first engagement instead of repeating the same order.
The strongest formation is usually the one that matches the next threat. A wall protects a point, a line controls space, a triangle creates pressure, and a circle denies cavalry access.
Final Formation Tips
Build your army around roles rather than forcing every unit into the same shape. Shields need support, spears need a cavalry lane to cover, archers need protection, and cavalry needs room to move. If one class fills every slot, your team may lose the counter game before the battle begins.
Use codes to support your summon budget, then practice one formation change at a time. Once you know how each unit behaves, you can study more specific matchups such as shieldbreaker timing, cavalry counters, or the best formation for a particular map.
FAQs
Wall formation is a strong defensive choice for shield units because it helps hold a capture point and protect support troops.
Archers usually work best behind shields in a line or defensive formation. They need distance and protection from cavalry.
No. Circle formation is designed to resist cavalry charges. Cavalry should reposition, attack another angle, or wait for the circle to open.
Use shieldbreakers with support, create pressure from another angle, and avoid sending a single unit into the wall alone.
Use triangle formation when your team is ready for a coordinated forward push. It works best when durable units lead the advance.